

DIY Disney Magic: 5 Easy Crafts for a More Magical Home
![[HERO] DIY Disney Magic: 5 Easy Crafts for a More Magical Home](https://disneybestlife.com/cdn/shop/files/Vd-NKCnY-AW.webp)
There's something special about walking into a home that feels like magic lives there. You know the feeling, that spark of joy when you spot a hidden Mickey or catch a glimpse of something that transports you straight to Main Street, U.S.A.
But here's the thing: you don't need to spend a fortune at the Disney Store to bring that enchantment into your everyday life. With a few simple supplies, a sprinkle of creativity, and maybe some hot glue (okay, definitely hot glue), you can transform your space into a castle of your own.
Whether you're a seasoned crafter or someone who thinks "DIY" stands for "Don't Involve Yourself," these five easy Disney-inspired projects are totally doable. Let's get crafting!
Why DIY Disney Crafts Are Pure Magic
Before we dive into the projects, let's talk about why making your own Disney décor is so rewarding.
First, it's personal. When you create something with your own hands, it carries a piece of your heart. That Mickey wreath on your door? It's not just decoration, it's a statement that says, "Magic lives here."
Second, it's budget-friendly. We all know authentic Disney merchandise can add up faster than a Lightning Lane bill during spring break. DIY lets you get creative without breaking the bank.
And third? It's just plain fun. There's something deeply satisfying about turning ordinary craft supplies into something that makes you smile every single day.
Ready to add some pixie dust to your space? Let's go!
1. The Classic Mickey-Shaped Wreath
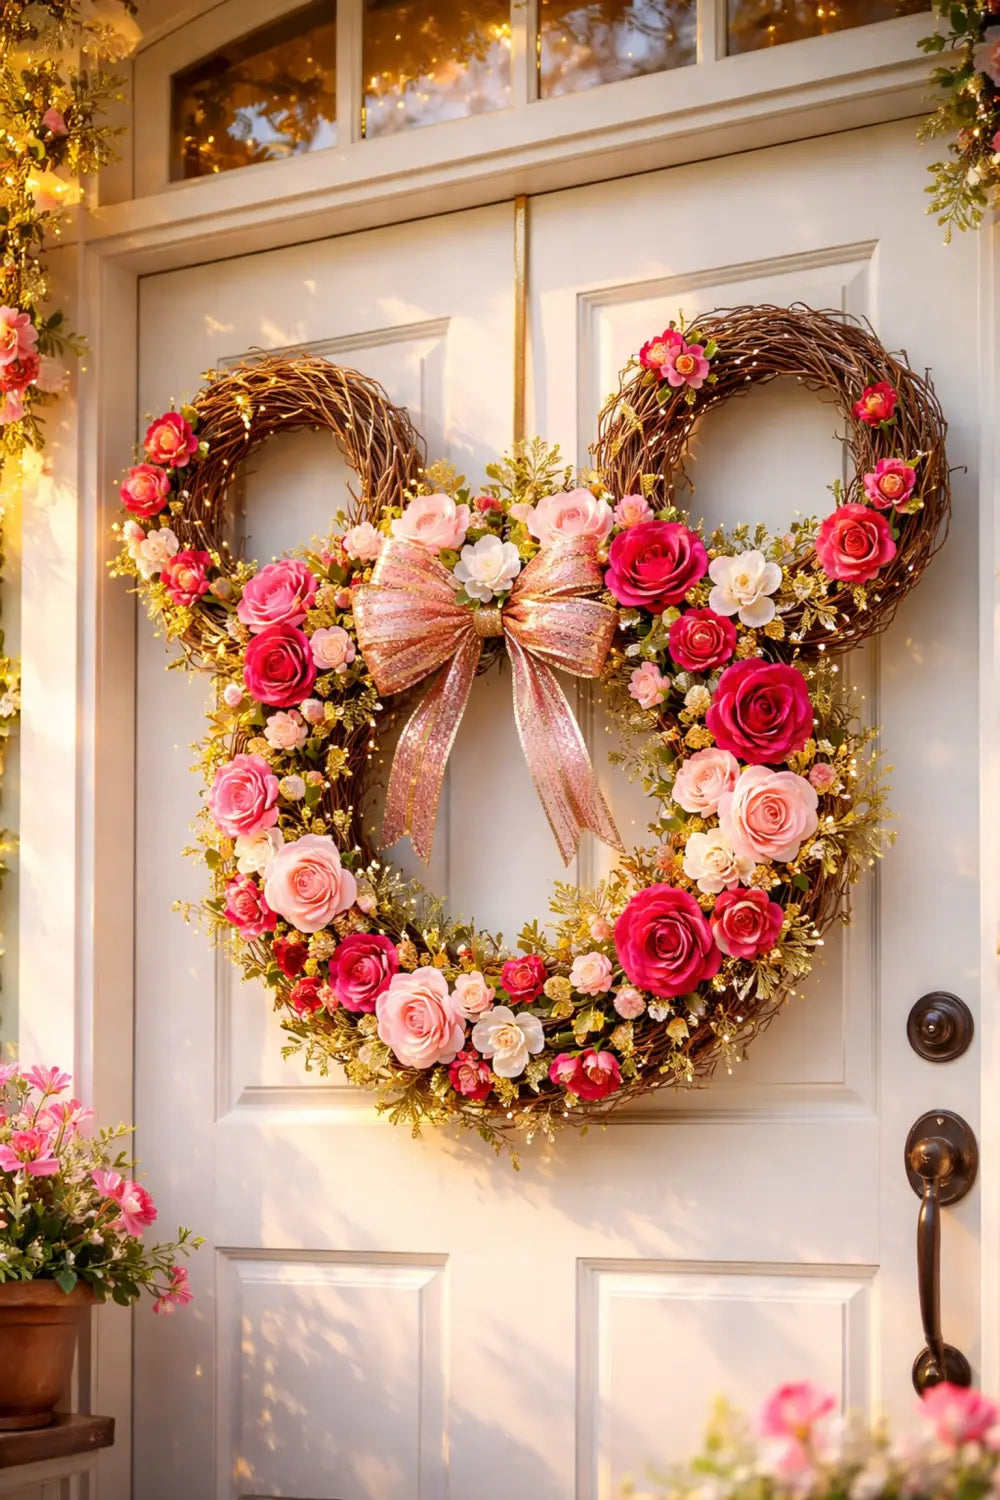
Nothing says "welcome to our magical home" quite like a Mickey-shaped wreath greeting guests at your front door. This project is surprisingly simple and makes a huge statement.
What You'll Need:
- Three foam or grapevine wreaths (one large for the head, two smaller for the ears)
- Ribbon in your favorite Disney colors
- Hot glue gun
- Faux flowers, bows, or themed embellishments
- Wire or zip ties for securing
How to Make It:
Start by arranging your three wreaths into Mickey's iconic silhouette. The large wreath forms the face, while the two smaller ones become those beloved ears. Use wire or zip ties to secure them together at the back, you want this to be sturdy enough to withstand the elements if you're hanging it outside.
Next comes the fun part: decorating! Wrap your wreaths in ribbon, leaving some of the base visible for texture. Then go wild with embellishments. Think faux roses for a romantic Minnie vibe, autumn leaves for a fall-themed Mickey, or even ornaments for the holiday season.
The beauty of this craft is that you can switch out the decorations seasonally. One wreath, endless possibilities!
2. Character-Inspired Coasters
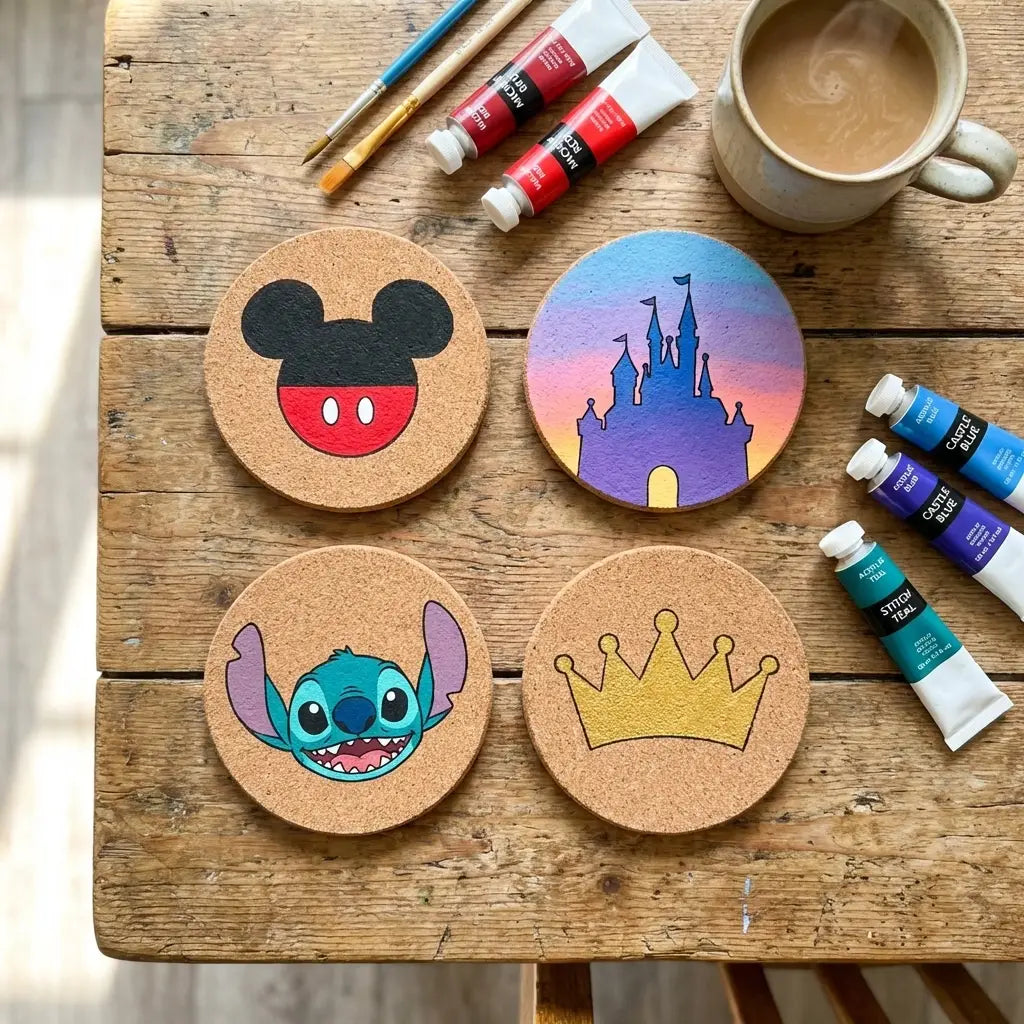
Protect your coffee table in style with these adorable character-inspired coasters. They're practical, pretty, and perfect for Disney movie nights.
What You'll Need:
- Plain cork or ceramic coasters (dollar stores are your friend here)
- Acrylic paint in various colors
- Small paintbrushes or sponge brushes
- Mod Podge or clear sealant
- Printed Disney character silhouettes (optional)
How to Make It:
If you're feeling artistic, freehand paint your favorite characters onto the coasters. Mickey ears are the easiest, just three circles and you're golden. Feeling ambitious? Try Cinderella's castle silhouette against a sunset gradient background.
For those who prefer a foolproof method, print out character silhouettes, cut them out, and use them as stencils. Trace around them with a pencil, then fill in with paint.
Once your paint is completely dry (patience, young Padawan!), seal everything with a coat of Mod Podge. This protects your artwork from condensation and everyday wear. Let it cure for 24 hours before using.
Pro tip: Make a whole set featuring different characters or parks. They make amazing gifts for your Disney-loving friends!
3. Enchanted Rose Lantern (Beauty and the Beast Style)
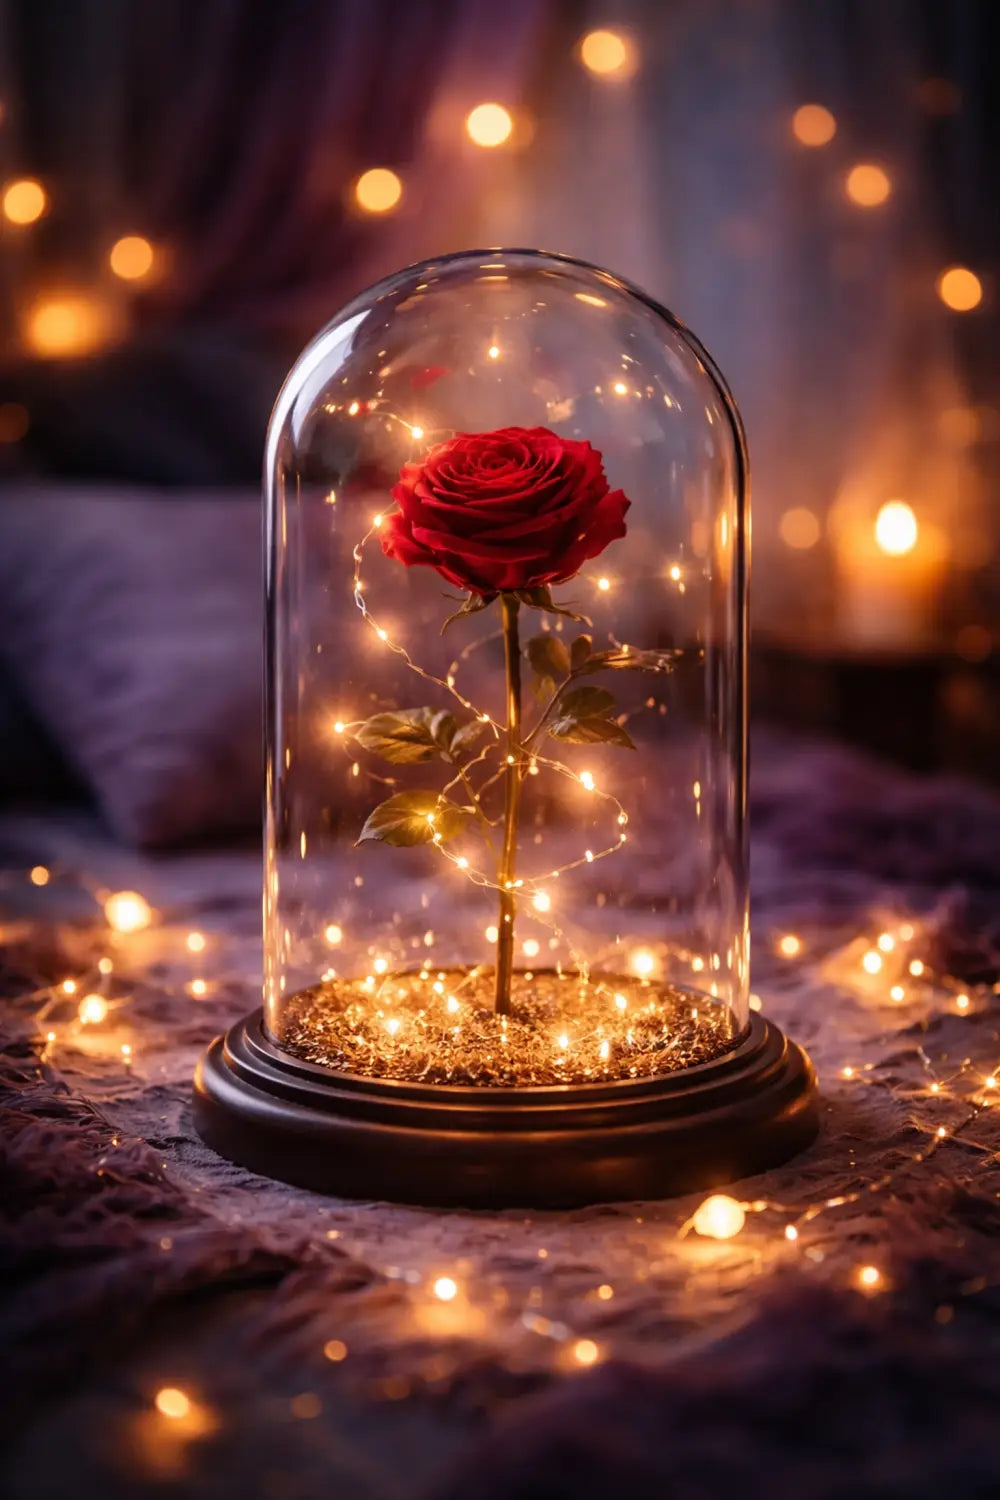
This one is for all the Beauty and the Beast fans out there. The enchanted rose is one of Disney's most iconic symbols, and you can create your own stunning version for way less than you'd think.
What You'll Need:
- A glass cloche or dome vase (check thrift stores!)
- One or two faux red roses
- A small wooden or decorative stand
- Battery-operated fairy lights
- Hot glue gun
How to Make It:
Start by trimming your faux rose to the perfect height for your dome. You want it to look elegant and proportional, not squished against the glass. If using two roses, arrange them at slightly different heights for visual interest.
Secure your rose to the stand with hot glue. Here's where the magic happens: wrap battery-operated fairy lights around the base of the stand before placing the dome over everything. When you turn on those lights in a dim room? Pure enchantment.
Place your finished rose on a bookshelf, mantle, or bedside table. It's romantic, it's whimsical, and it definitely sparks conversation.
4. Mickey Mouse Dream Catcher
Sweet dreams are made of this! A Mickey-shaped dream catcher combines boho vibes with Disney magic, and it looks absolutely adorable hanging in a bedroom or nursery.
What You'll Need:
- Three embroidery hoops (one large, two small)
- Yarn or ribbon in your chosen colors
- Lace doilies or decorative webbing
- Feathers, beads, and charms
- Hot glue and scissors
How to Make It:
Wrap each embroidery hoop completely with yarn, securing the ends with hot glue. Choose colors that match your room's décor, classic red and white for Minnie, all black for a sleek Mickey, or pastels for a softer look.
Arrange the wrapped hoops into the Mickey shape and secure them together with additional yarn or hot glue. Inside the large hoop, attach a lace doily or create a traditional dream catcher web pattern using thin string.
Finally, add hanging elements to the bottom: feathers, beaded strands, or small Disney-themed charms. Attach a loop at the top for hanging, and you're done!
This craft is especially fun to make with kids. Let them choose the colors and help with the wrapping, it's a great bonding activity.
5. Disney Vacation Savings Jar
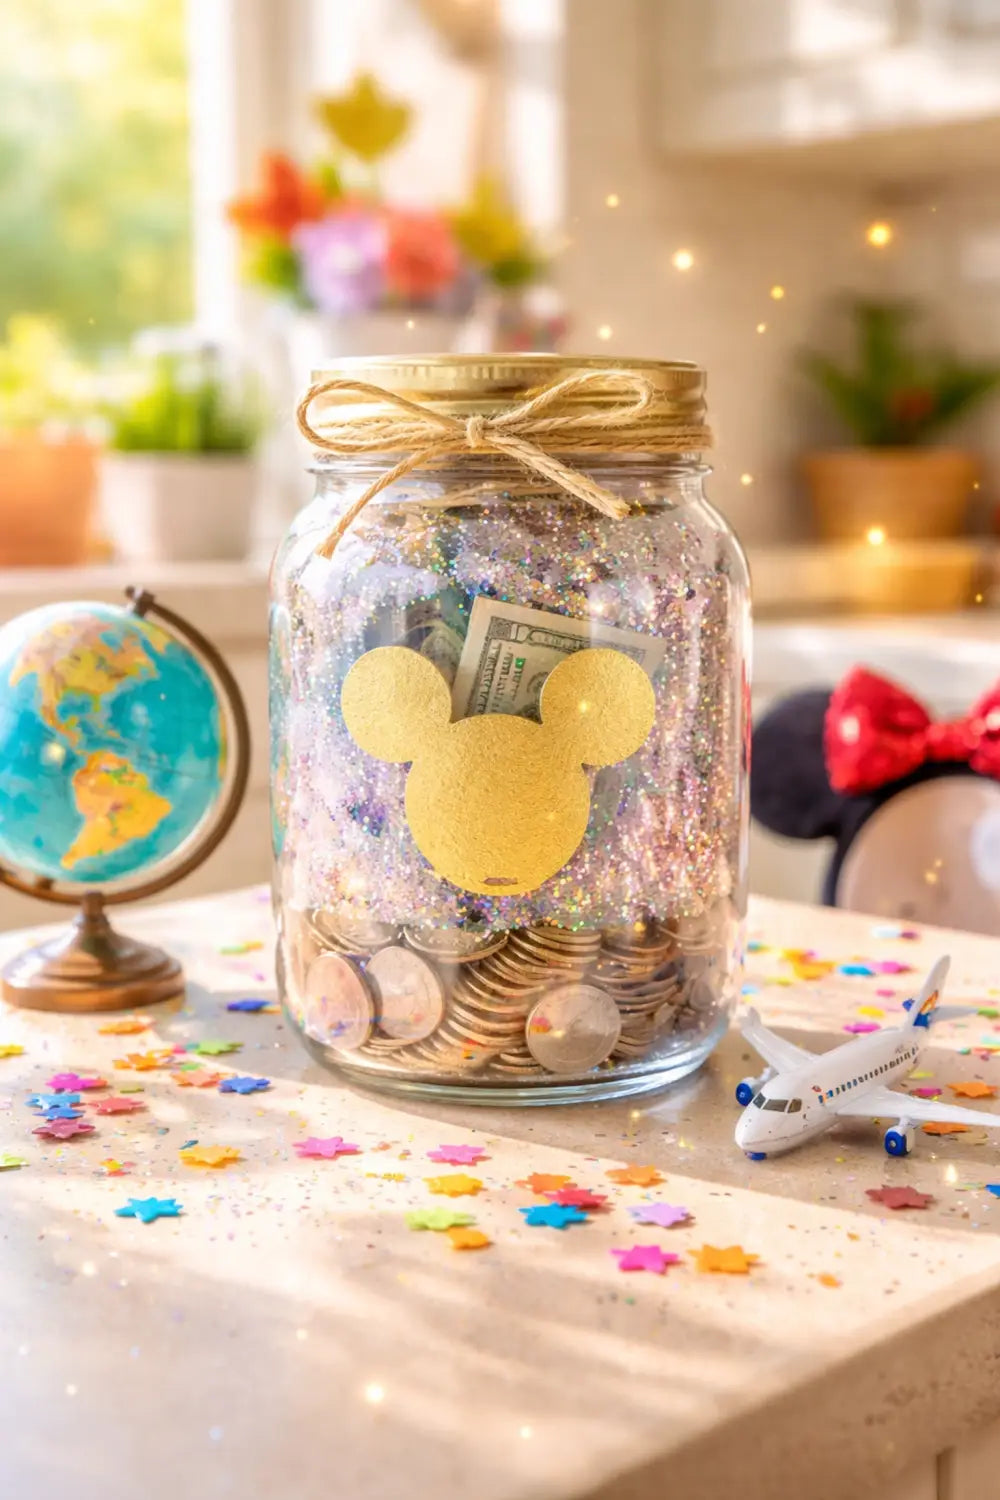
Okay, this one is equal parts décor and motivation. A beautifully decorated savings jar keeps your Disney trip fund front and center while adding charm to your space.
What You'll Need:
- A large glass jar or container with a lid
- Acrylic paint or vinyl decals
- Glitter (because obviously)
- Mod Podge
- Labels or a paint pen
How to Make It:
Clean your jar thoroughly and let it dry completely. If you're going the painted route, apply a thin layer of Mod Podge to the outside, then sprinkle glitter over it for that pixie dust effect. Let it dry and seal with another layer of Mod Podge.
Add vinyl decals of Mickey ears, castle silhouettes, or phrases like "Adventure Awaits" or "Disney Fund." If you don't have a vinyl cutter, use a paint pen to hand-letter your message.
Place your jar somewhere visible: on a kitchen counter, entryway table, or home office desk. Every time you drop in spare change or a few dollars, you'll feel that excitement building. Before you know it, you'll be booking those park tickets!
For more ways to stretch your Disney dollars, check out our guide to every known Disney discount for 2026.
Tips for Crafting Success
Before you grab that hot glue gun, here are a few tips to make your DIY Disney projects shine:
- Start simple. If you're new to crafting, begin with the coasters or savings jar. Build your confidence before tackling the wreath or dream catcher.
- Shop smart. Dollar stores, thrift shops, and craft store clearance sections are treasure troves for supplies.
- Make it yours. These projects are templates, not rules. Love Stitch more than Mickey? Go for it! Prefer villains over princesses? Create an Ursula-inspired piece!
- Embrace imperfection. Handmade items have character. That slightly wonky Mickey ear? That's charm, baby.
Bring the Magic Home
You don't need a FastPass to experience Disney magic every day. With these five easy DIY projects, you can surround yourself with the wonder and whimsy that makes Disney so special: all while expressing your unique creativity.
So clear off that craft table, put on your favorite Disney playlist, and let the magic begin. Your home is about to get a whole lot more enchanted.
Now, which project are you tackling first?